
Radio and speaker installation
MGB V8 - front suspension drawings |
www.VORD.net |
Neither VORD.net nor Malcolm Vardy can take any responsibility for any modifications you might make to your car. These drawings are a representation of the modifications I have made to my car and are offered without any claim or guarantee that the design is either safe or roadworthy. Whatever you do with these drawings you do at your own risk. Having said that you are welcome to download the drawings for use as a wallpaper, or to mount in a picture frame in your living room. Click on the drawings to see full sized versions. The drawings are best printed out and viewed on paper. Download all drawings: front_suspension_drawings.zip (205kb) |
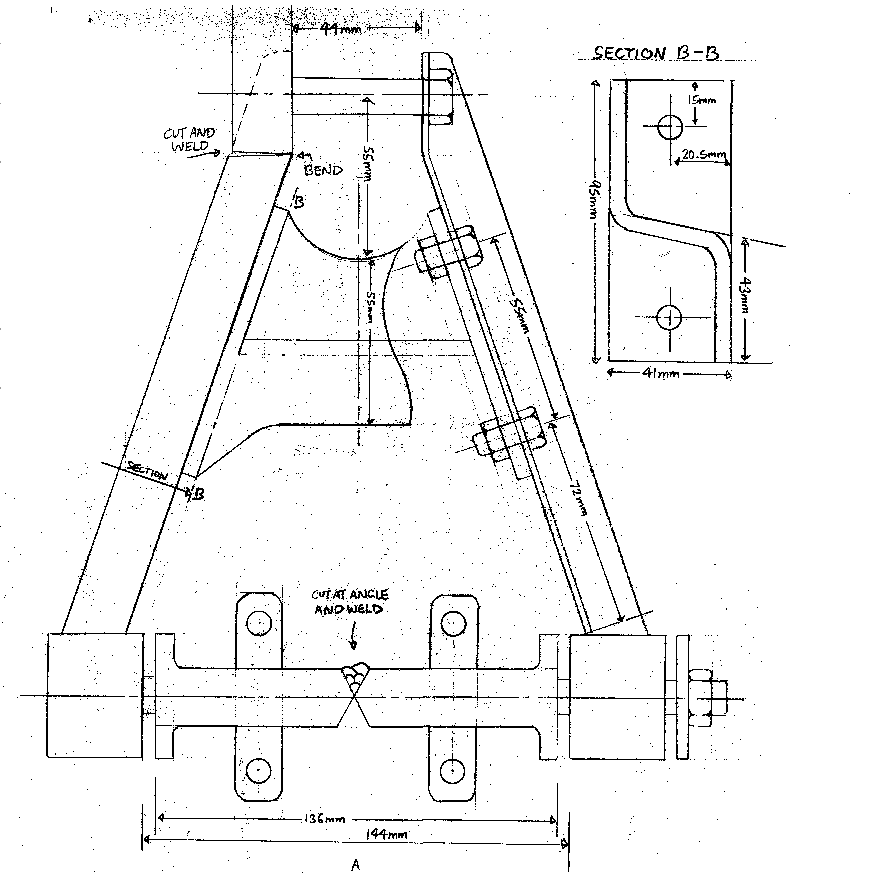 |
Upper ArmsThe upper arms are made from shortened lower arms. The upper arm flange is cut at the outboard end, the arm is bent and the flange re-welded. Similarly the mounting pin from the lower wishbone is cut and welded in the centre. The cross brace acts as a bumpstop (against the original bumpstop rubber) and bends upwards at the rear to clear the crossmember. I have drawn the cross brace as 5mm steel, however 3mm would probably be enough. |
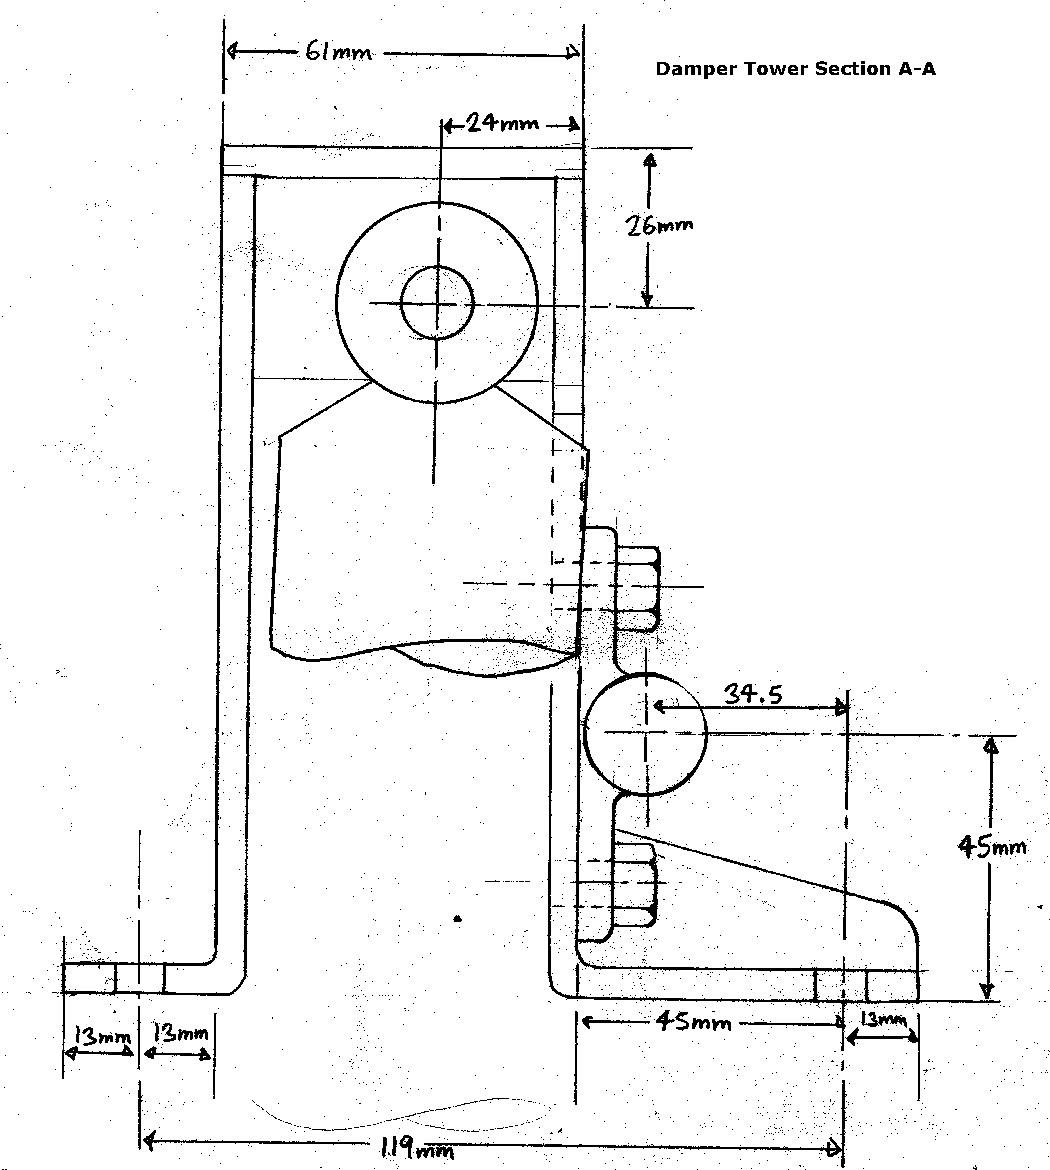 |
Damper Tower (side view section)I made the damper tower from 5mm steel plate. I would do it in 3mm plate next time, as clearances are very tight between the damper and the tower. So tight that a slot needs to be cut on the inside face to allow the damper body to poke through. The damper itself is Koni Classic sold as part of the MG Owners Club UK front damper conversion kit (but available separately). Identifying markings are 0301 and 80 2716 CR. The distance between the upper and lower bolt holes is 342mm fully extended and 236mm compressed. |
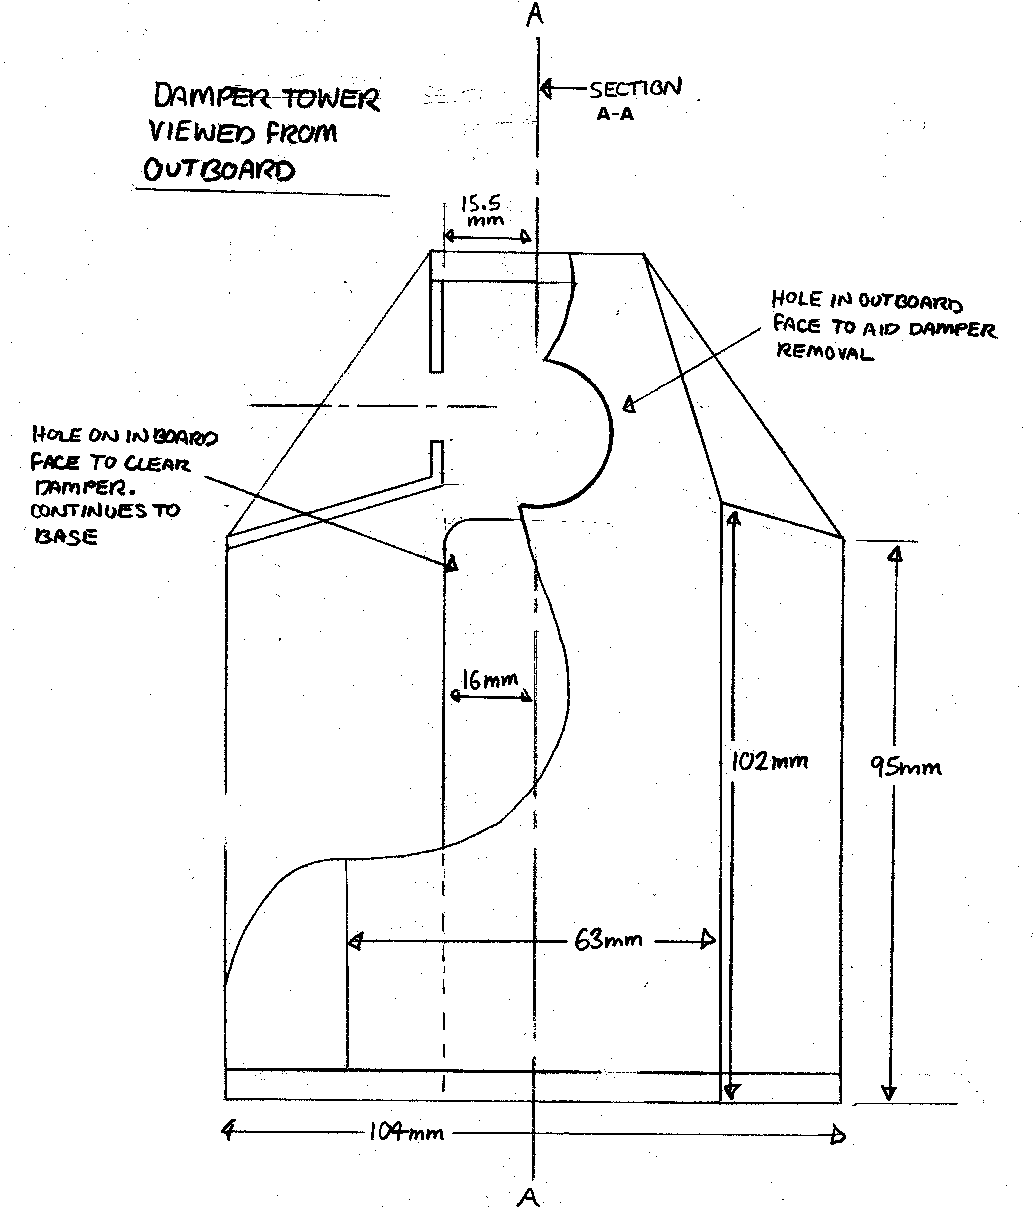 |
Damper Tower (Front View)This cut out view shows the mounting for the damper top mount, the hole in the inboard face to clear the damper, and a further hole in the outboard face to make it easier to remove the damper. The front face is narrower than the rear face to allow plenty of clearance to the upper wishbone. |
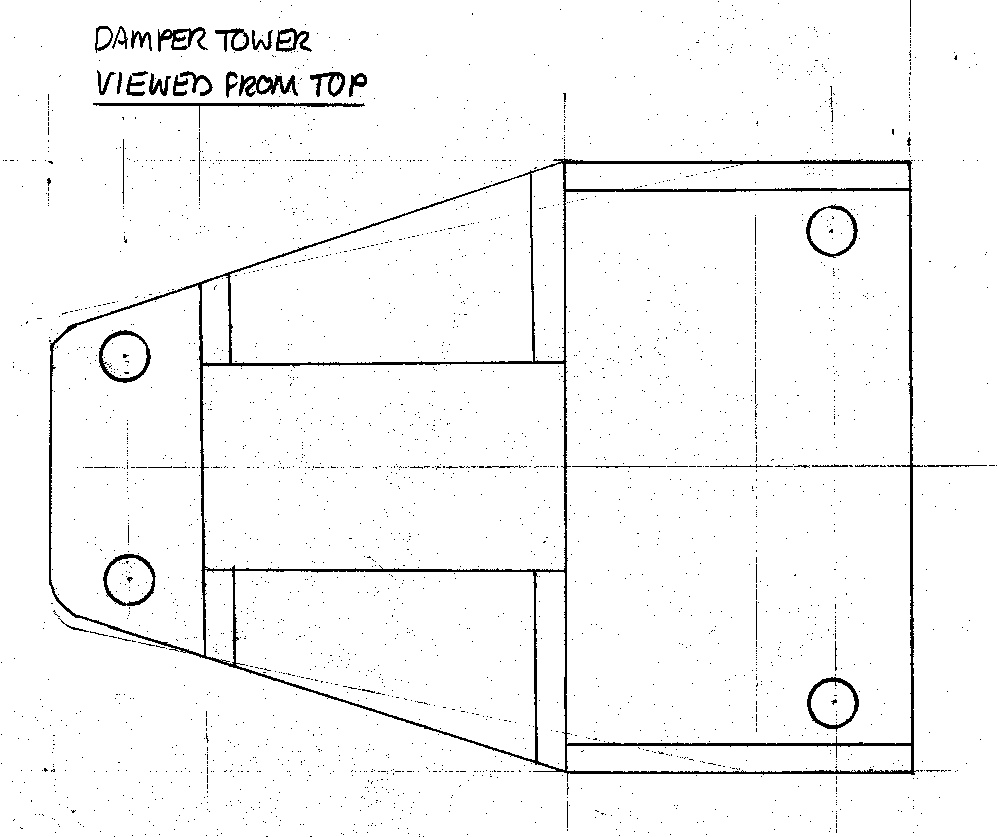 |
Damper Tower (Top View)You will need to refer to the other views to understand this one. The rectangle in the middle is the very top of the damper tower. The vertical lines above and below the rectangle are buttresses made by the inboard and outboard faces. The horizontal lines to the right are buttresses to reinforce the upper arm mounting back to the inboard mounting holes. |
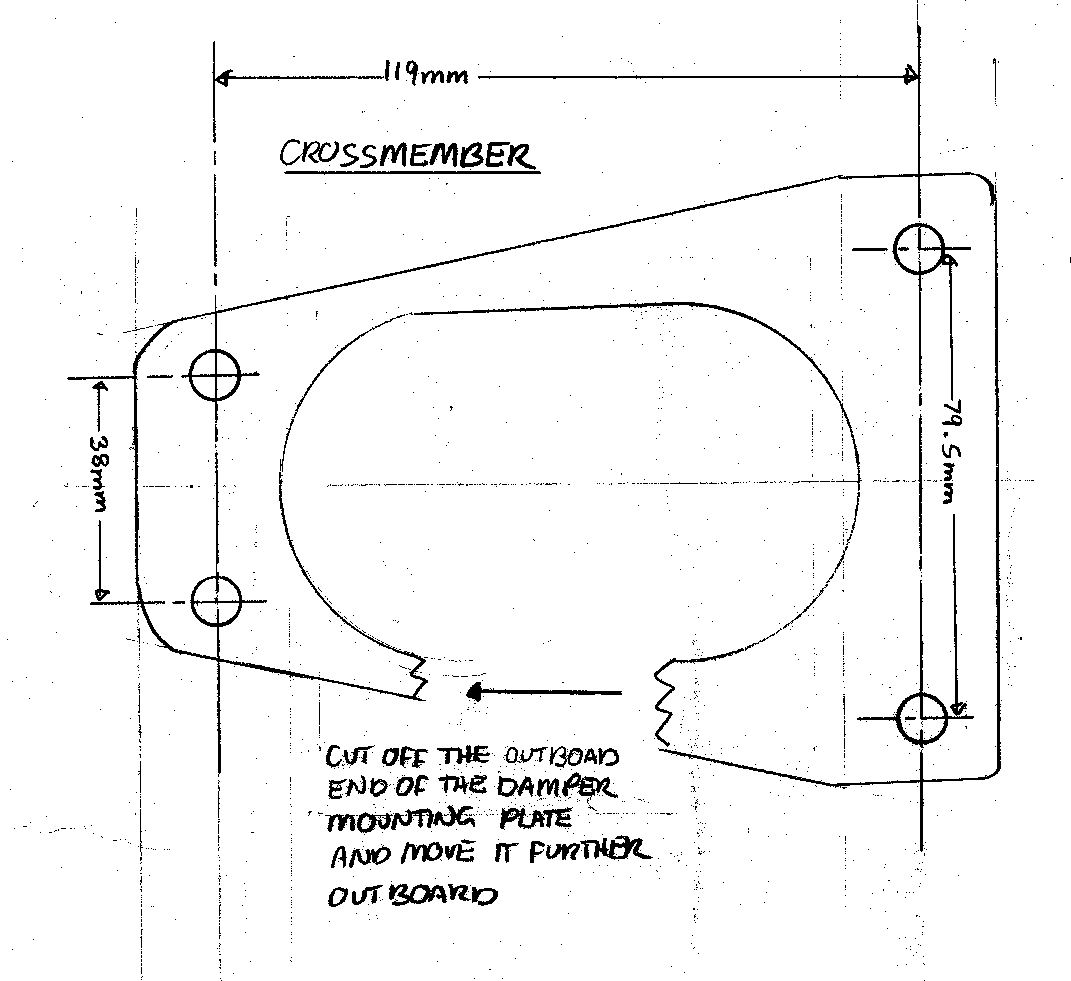 |
Crossmember ModificationsThe positions of the mounting holes are shown on this drawing of the crossmember. The inboard mounting holes are the original damper inboard mounting holes. The outboard holes are some distance outboard of the original holes. The original damper is mounted on a 15mm thick steel plate. The outboard half of this plate needs to be cut out and moved outboards, then re-welded. New mounting bolt holes need to be tapped through the weld you have added. |
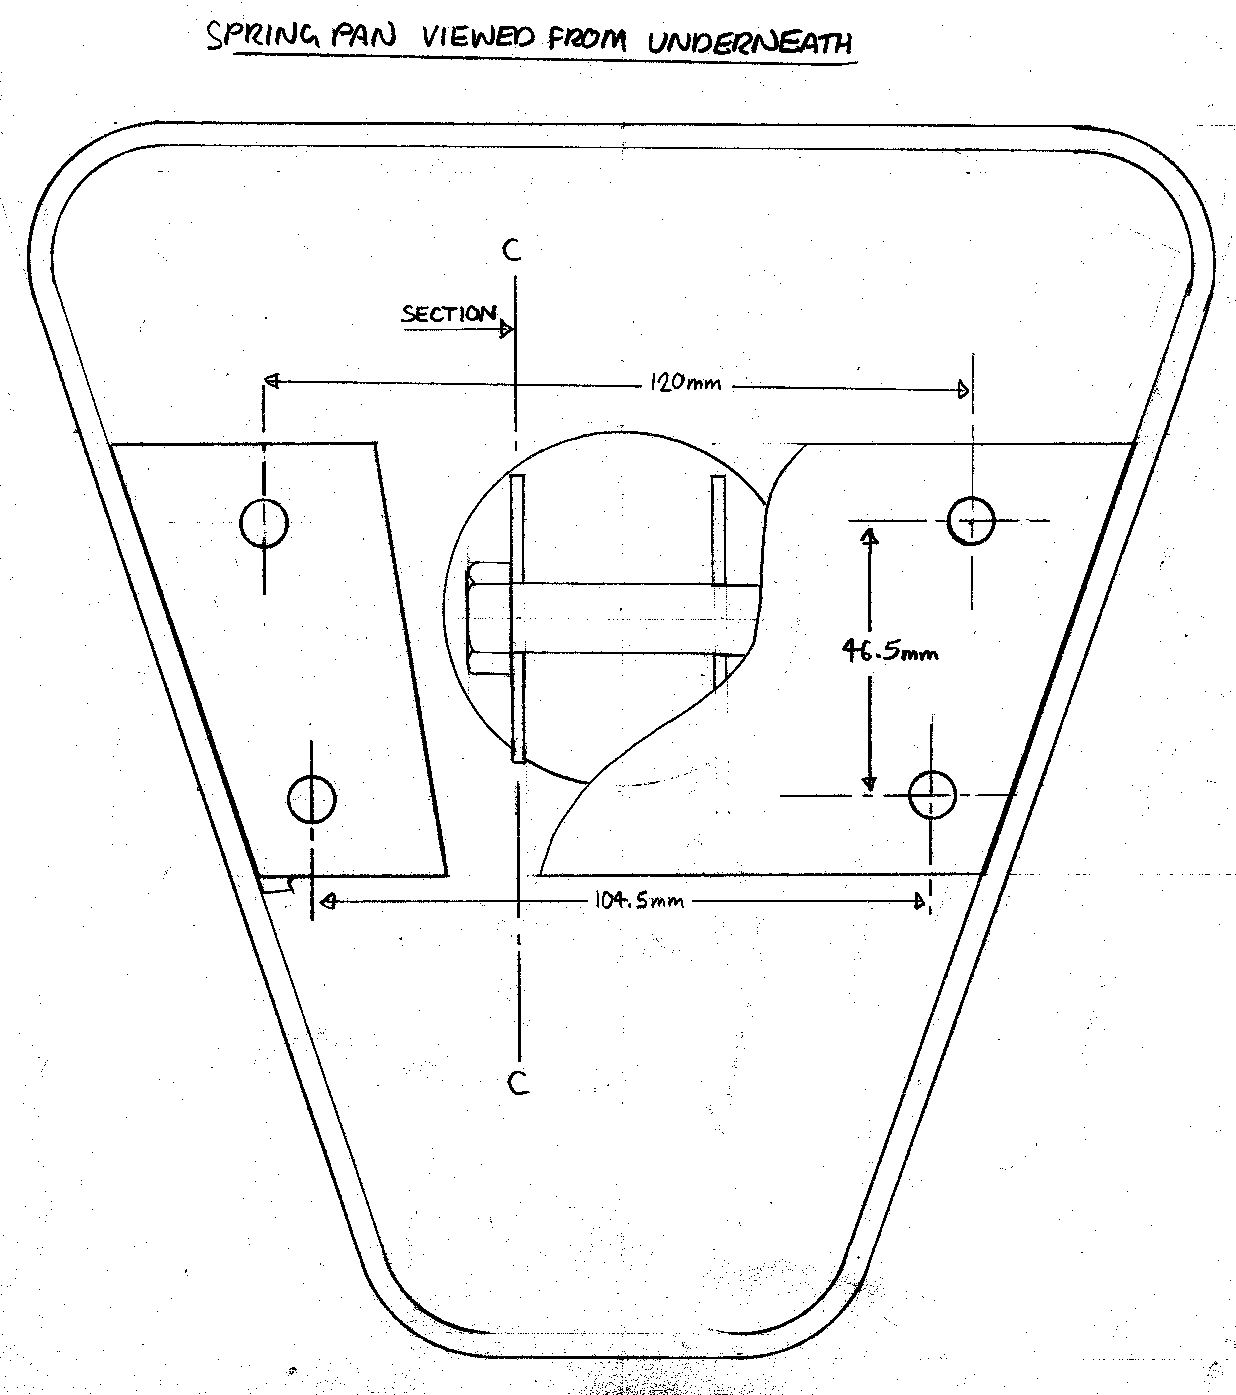 |
Spring Seat and Lower Damper MountingThe lower mounting of the damper is mounted on a removable plate (shown to RHS of drawing with a cut away to the left) which bolts on to 2 mounting plates with captive nuts welded to the spring pan (shown to left of the drawing). the bolt holes are arranged to allow the use of captive nuts. All of the new steel is 5mm thick. The plate needs to be pretty stiff to cope with the bending loads applied by the damper.
|
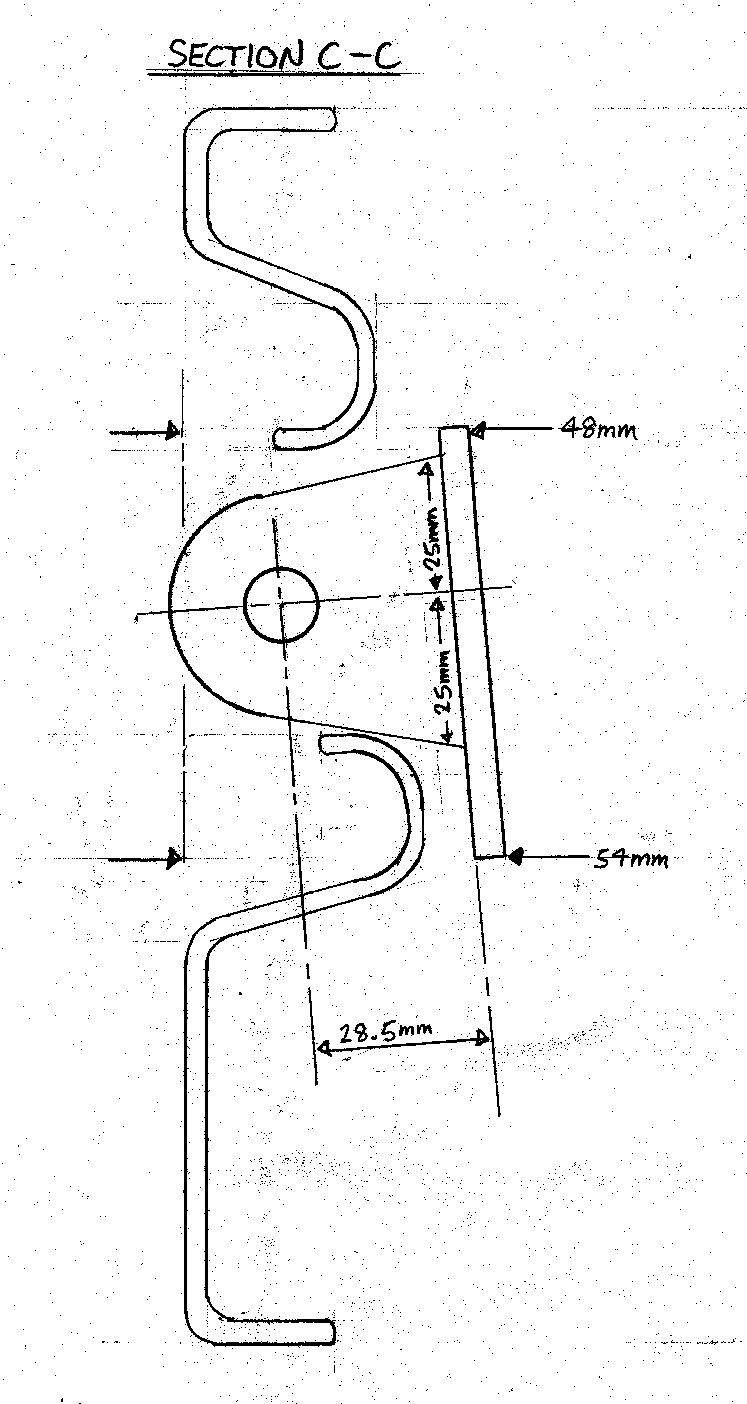 |
Spring Seat SectionThis section of the spring pan shows the position of the damper lower mounting. The damper mounting sits above and outboard of the centre of the spring base. This is to compensate for the bending of the spring as the suspension compresses in bump, and ensures there is always clearance between the damper and spring. The 2 mounting plates are not shown in this drawing. |
If you do decide to base your own modifications on these drawings then I would be interested to know how you get on. I've tried to include all of the critical dimensions, but many dimensions of existing components have been left off. Let me know if I have left out anything important. Please also use the photographs of my front suspension for refererence.
I have seen some conversions that cut off the end of the crossmember including the bumpstop, and place the damper there. I haven't made any measurements but wonder whether it would be possible to retain the original lever arm (drained of fluid) for the upper arm mounting. That would make things a lot simpler.
Back to: Home > MGB V8 Conversion