
Datsun 240Z - Sneak Preview |
www.VORD.net |
The Datsun had been imported from the US and was bought on eBay for much less than the new owner expected. While largely rust free it has a lot of poorly repaired accident damage, possibly resulting from a roll, and the pragmatic US bodyman has cut bits out, straightened them, then welded them back on. Repairing a shell in this state is probably more time consuming than starting with a straight rusty shell that hasn't been messed around with, but the central tub is reasonably straight, so a little jugging and replacing everything halfway structural ought to have the shell in good condition. |
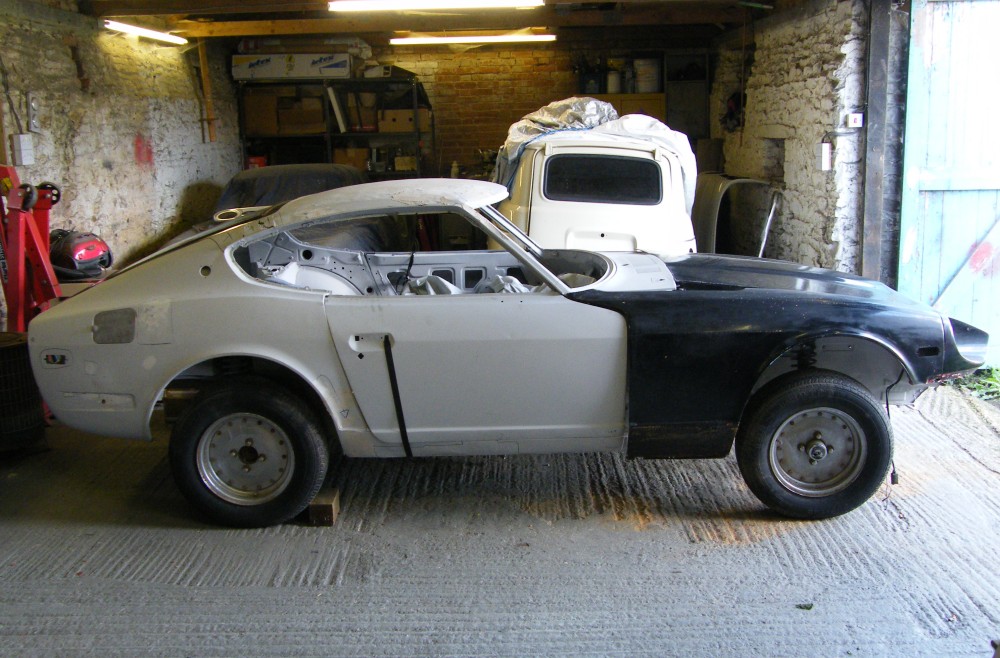 |
Here's the car as it first rolled into the workshop. The panels are just resting in position. The shell has been stripped, shotblasted and primed. From a distance it doesn't look too bad apart from the wheels which are a weird aftermarket split rims with solid centres about half an inch thick. It's been shotblasted (in places) so ought to be clean to work on with not too much underseal to remove. Even jet washing a car underneath makes a huge difference to a body restoration - without that you forever get bits of dirt in your eyes as you go underneath. |
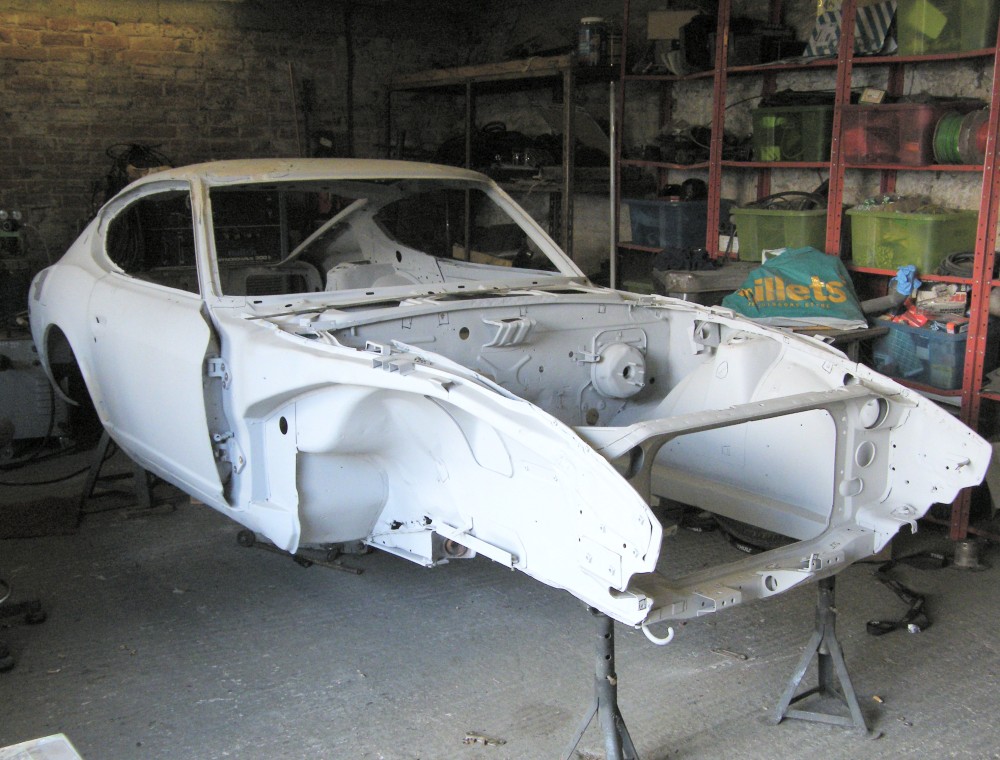 |
With the panels safely stored in the roof space a good inspection can begin. A rough measurement reveals the LHS front longeron is 15mm higher than the right. That's not a good start. The sill on the RHS has gone the way of the banana, mostly through jacking, but there looks to have been a ding as well. On the plus side it is virtually rust free and the doors seem to fit reasonably well. |
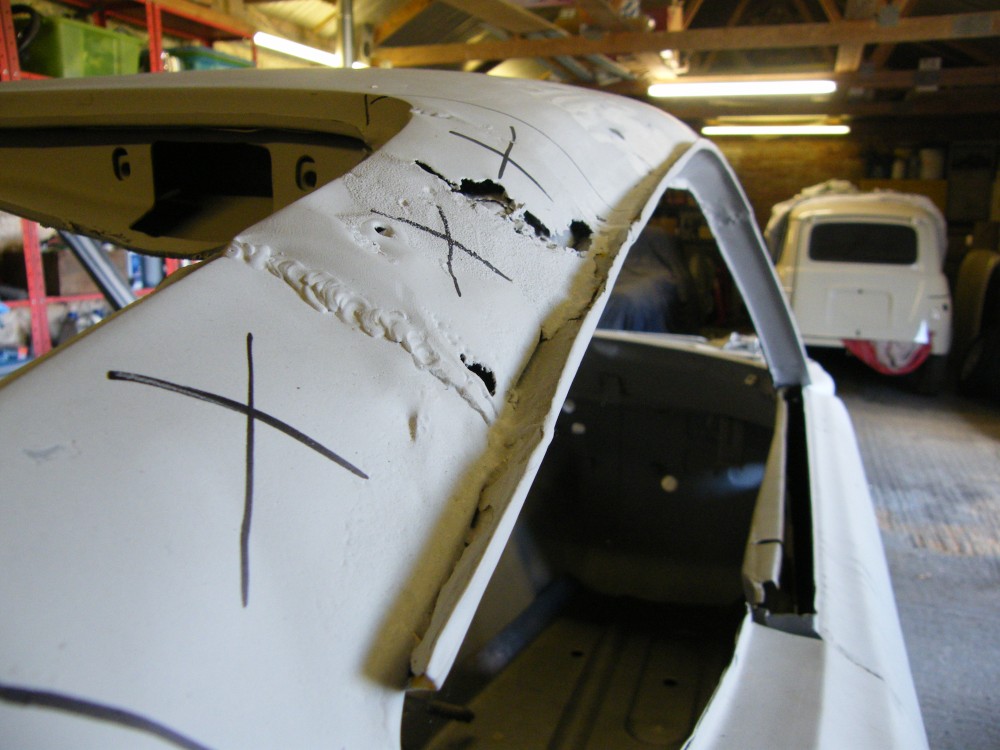 |
Closer up the shell doesn't look quite so nice. The roof panel seems to have been bent at some point, and someone has removed it to make it easier to straighten. Alignment didn't seem to be a big consideration in refitting, and the rear of the roof is 15mm low at the LHS. Oddly straightening didn't seem high on the list of priorities either. The LHS front screen pillar has been bent, and there's rust in it's mounting to the bulkhead. The RHS pillar is straight but there's a crack in it's mounting (I'm lead to believe this is common, and the design is fairly hideous so I'd not be surprised). |
 |
This is the part that connects the slender underfloor chassis section with the front longitudinal member on the right of the car. The rust is an easy repair. The fatigue cracking on the side panel at the lower longeron joint and on the inner wheelarch are more of a concern. The best fun is the angle iron that has been used to support the front crossmember, and the plate that's been attached to the underfloor chassis member. |
 |
Turns out those bits of angle iron were a repair to resolve the issue of the track control arm having fallen off. Presumably the double skinned area was put there by the factory because of stress issues, and once it had rusted out (as double skinned areas tend to do), that stress was concentrated on a couple of spot welds which have popped. |
 |
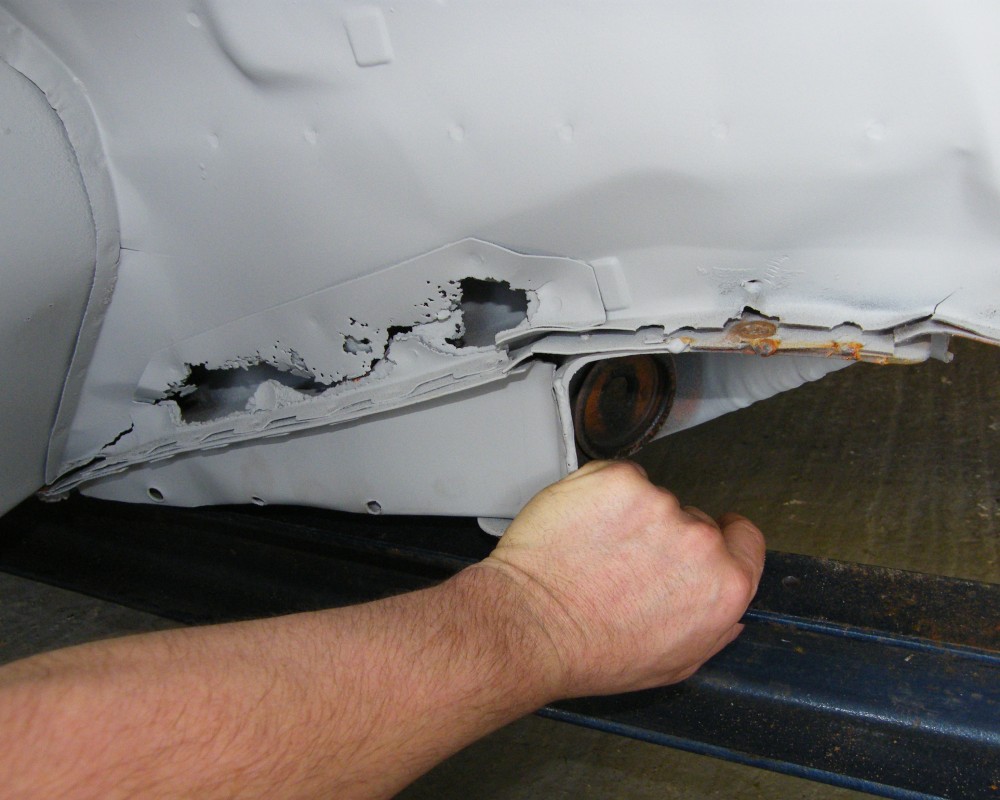
The floor has been repaired using the time honoured pop rivet joining process. It has knocked around and has a lot of jacking damage. This is the side with the sill that hasn't been very well looked after (the one on the other side is perfect). |
 |
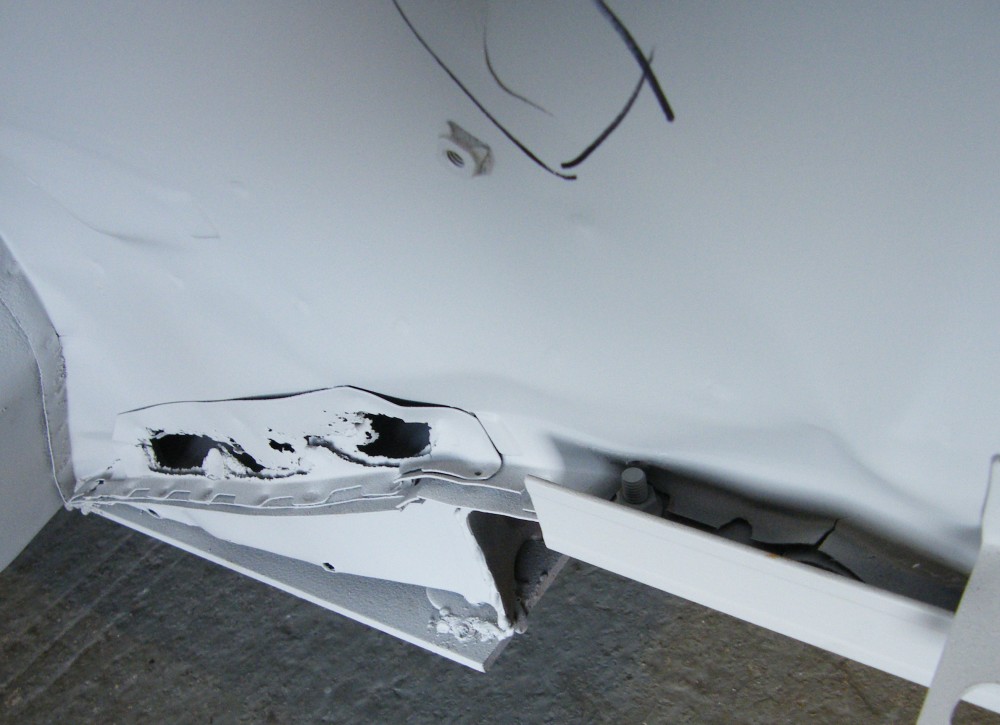
The rear of the sill is also bent. Fortunately the repairer had the wisdom to cut out part of the inner sill for hammer access to knock it straight. They didn't knock it quite far enough as with the door sitting in roughly the right place there's a fair gap. Ignore the body filler in the photo - signs of optimism before the car arrived here. |
 |
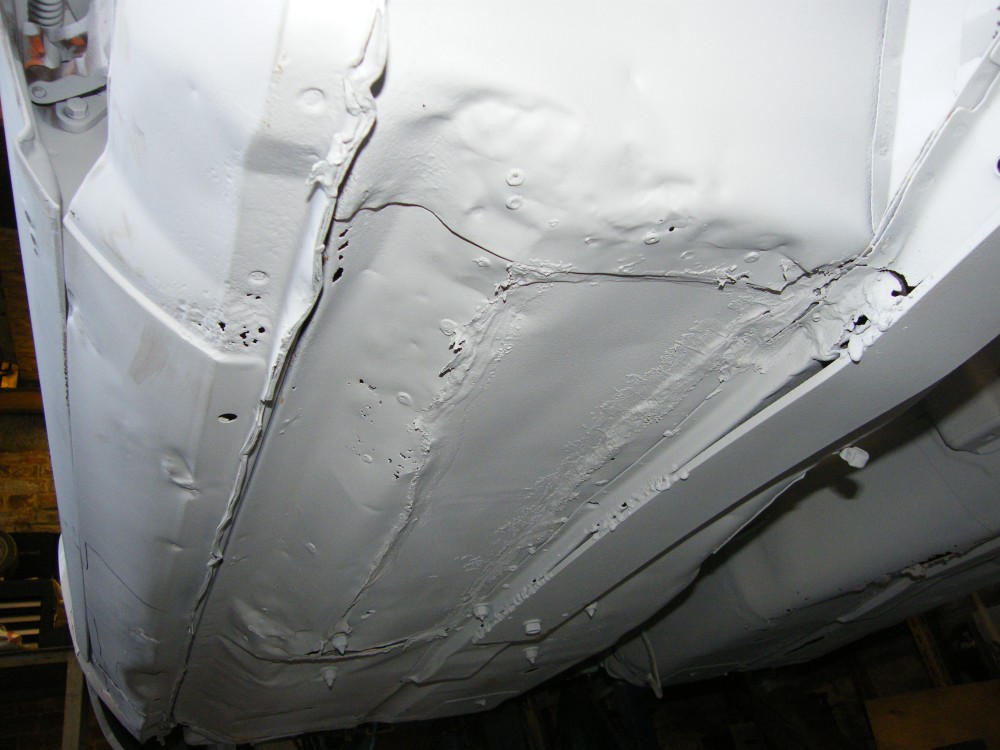
But it's not all bad news. The main tub is otherwise straight and rust free. No need for all the messing around with rust and rot in the seams like you'd need to do with UK cars. The nasty areas in the photos above are localised in the floors, front chassis rails, and worst the roof. The rear chassis, rear tub and tunnel measure up as straight. |
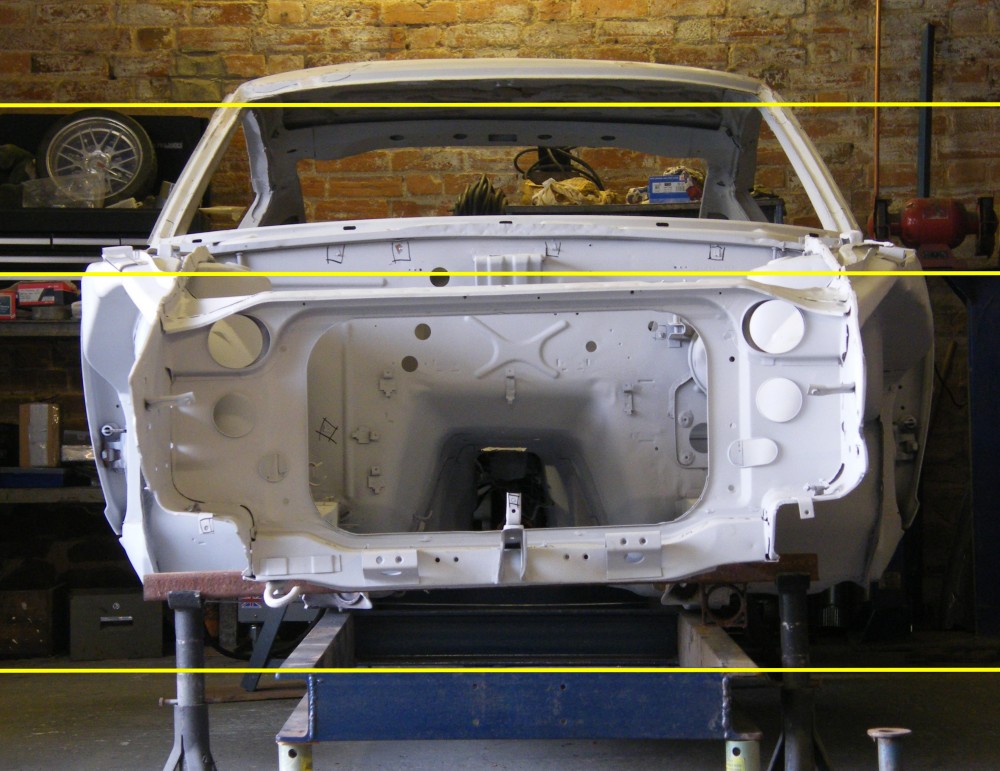 |
The repairs will need a jig. That's the blue thing in the bottom of the photo. It's been lined up with the rear suspension mountings, and fortunately lines up perfectly with the bulkhead swage just below the middle yellow line. The RHS of the car (left in the photo) measures up well. The other side is high at the front, not helped by that shotgun repair which needs removing. The roof has not been welded on straight either. Next installment will be building the attachments for the chassis jig to dimensions from the factory manual. Once that's done a lot of bits of Datsun will be going in the bin. |
Next: VORD's Classic Cars > Datsun 240Z > Chassis Jig