
Changing a Land Rover Chassis in a Weekend |
www.VORD.net |
||
You would think that a bunch of people expecting to change the chassis on a Land Rover in a weekend would have to plan things through in great detail. In fact the conversation went something like this: "Hello Vord, can I come over and borrow a barn for a chassis swap at the weekend?" "Are you bringing beer?" "I've got a barrel of Jupiter from the Milton Brewery" "OK then" |
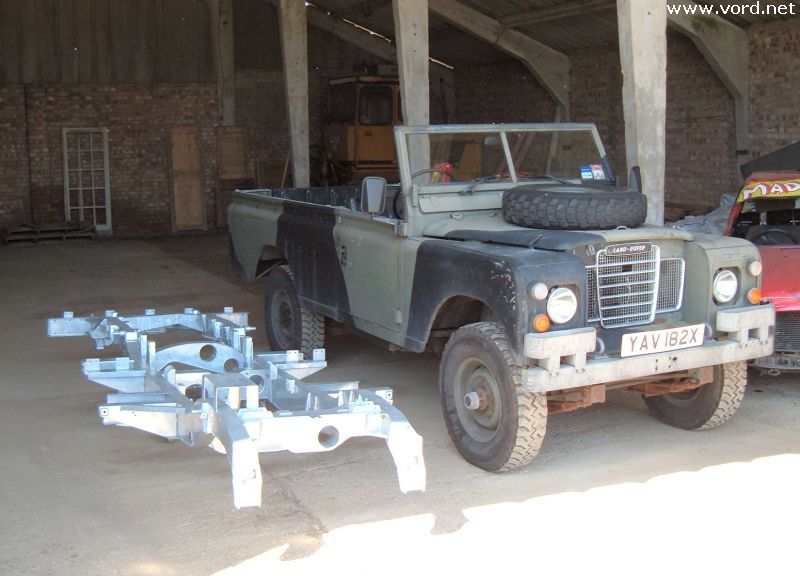 |
Here's Chris's Land Rover in the barn beside the brand new chassis. The old chassis had been patched over the years and needed more and more patches for every MOT. |
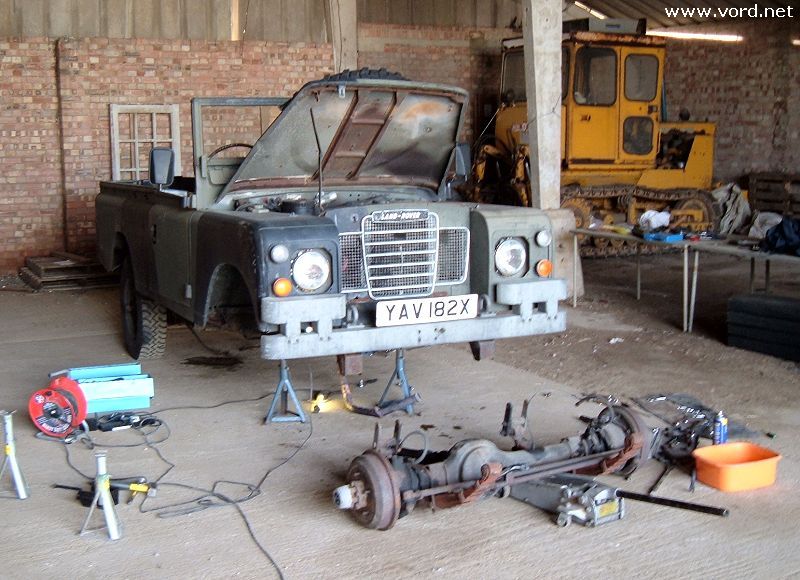 |
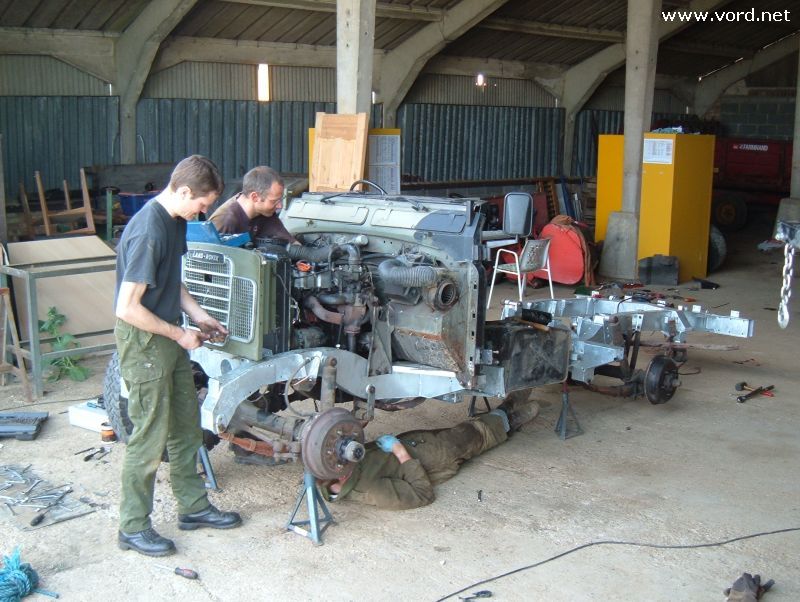
Our cunning plan was to have people working on the old car and the new chassis at the same time to avoid getting in each others way. The axles were the first bits to come off. These could be bolted on to the new chassis while other people were unbolting more bits from the old one. |
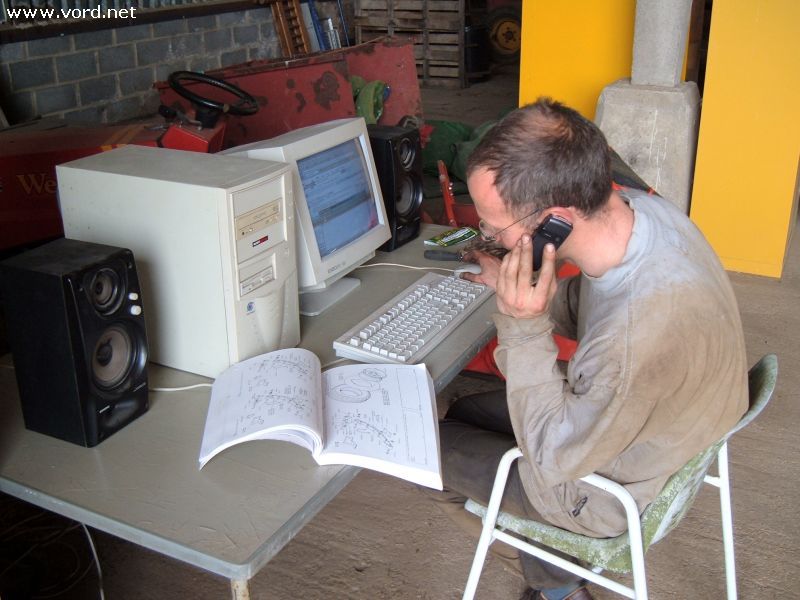 |
The first (and last) big problem. The rear spring hanger bolts have seized to the bush inner sleeves. We need new ones! Luckily our big barn was internet enabled and Chris was able to Google for Rogers Land Rover in Bedford who were very helpful. |
 |
The chassis was delivered by Marsland Chassis and was very impressive. All of the odd military bits were fitted in just the right places. The galvanizing on the new chassis had been done very thoroughly. All the bolt holes needed to be drilled out and the threads tapped. With this done the chassis could be built up prior to transferring over the body sections. |
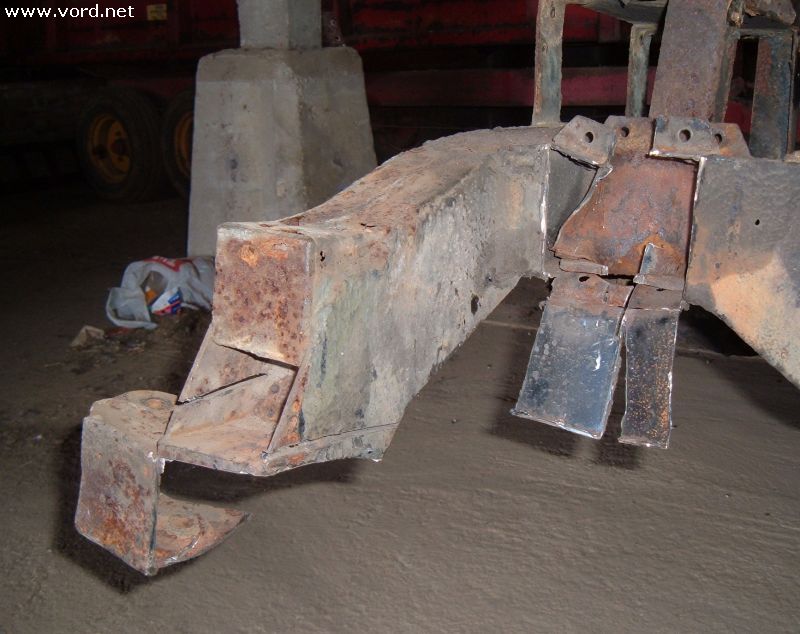 |
If you are planning to do this at home you'll need lots of angle grinders, really big hammers, and cold chisels to remove rusty parts from the old chassis. Fortunately the Land Rover owners in the crew brought their own tools, so we had quite a lot of big hammers. The devastation in the photo resulted from a rusted in steering part and a bumper bolt that snapped in an inconvenient place. |
 |
The first big body section to come off the old chassis was the bulkhead. Actually I missed the fun. I'd promised a barbeque on Saturday night, and come 6:30 in the evening I realised I'd forgotten to weld the barbeque together. Oops. By 7:30 an old diesel barrel had been chopped in half, and the fire was going nicely. I heard a few cheers from the barn during this hour, and when I popped my head around the door the body had vanished. |
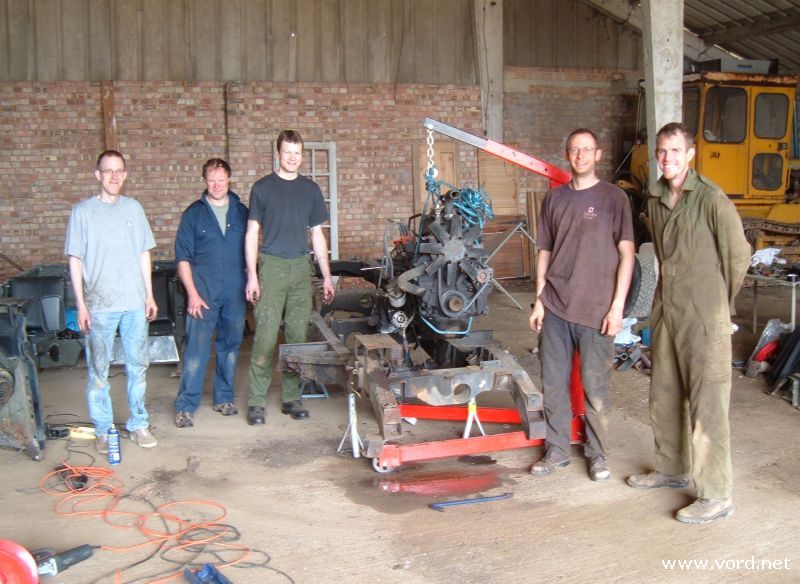 |
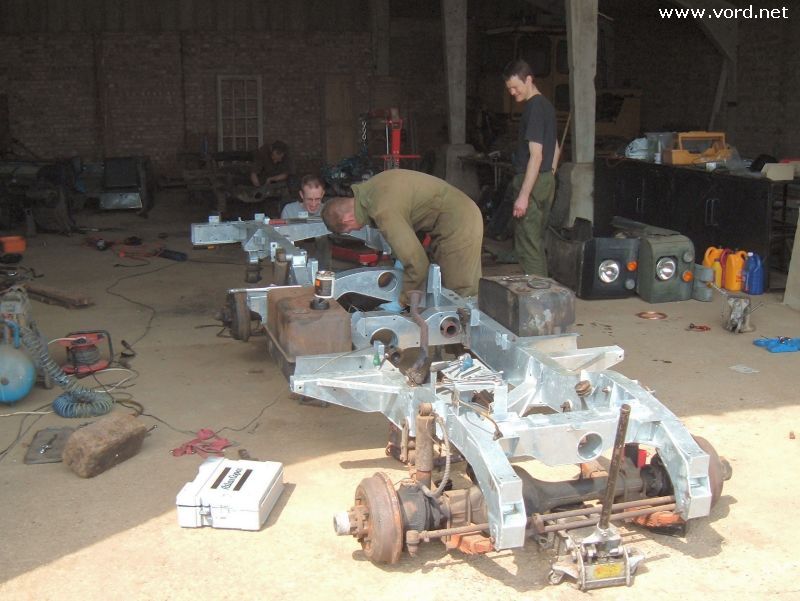
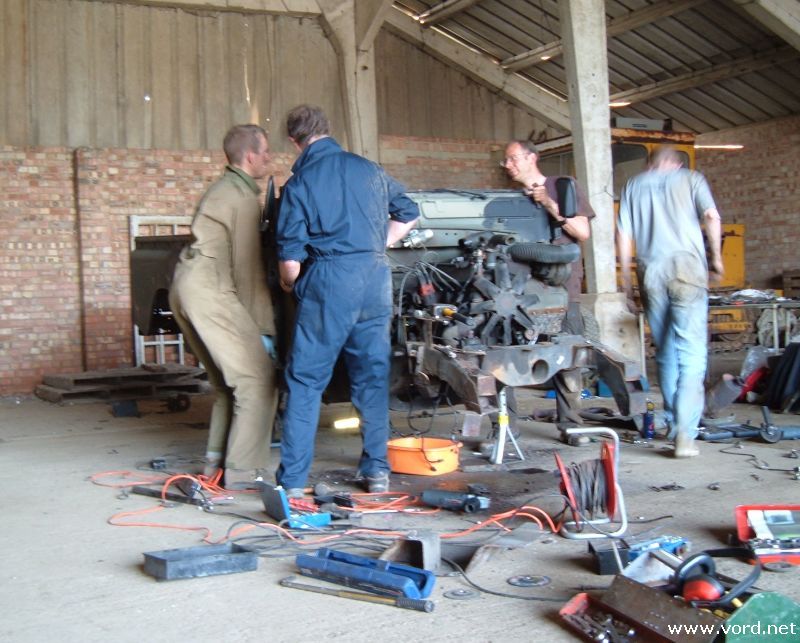
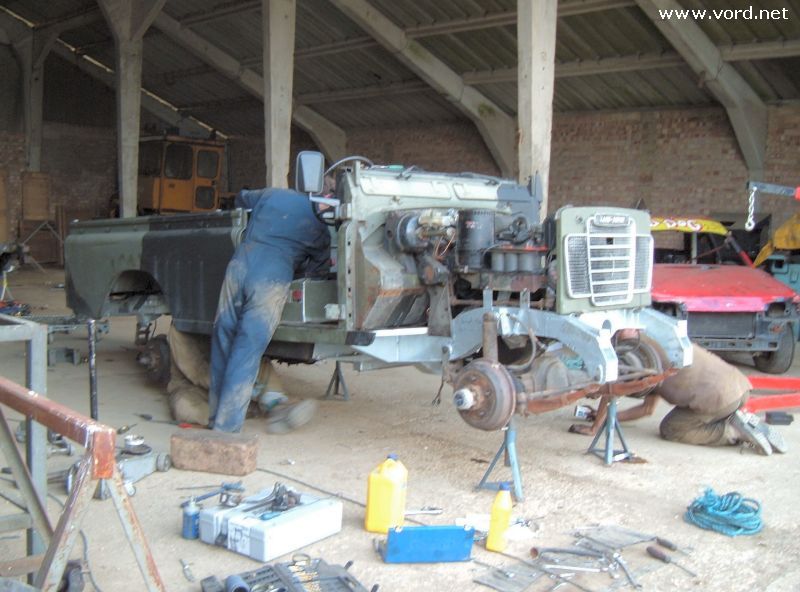
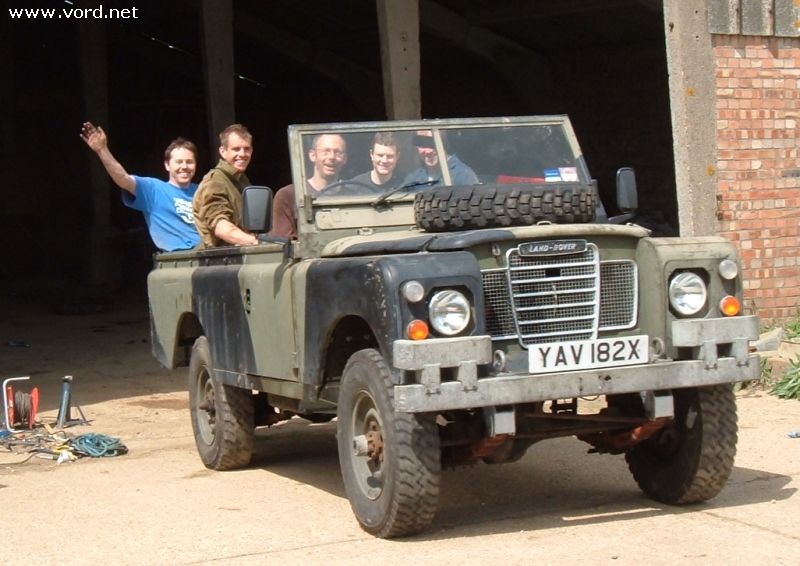
On Sunday morning there was enough body missing to lift the engine out together with the gearbox. I should introduce the crew. From left to right: Steve, Chris, Robert, Chris (the owner of the Land Rover), and Bart. |
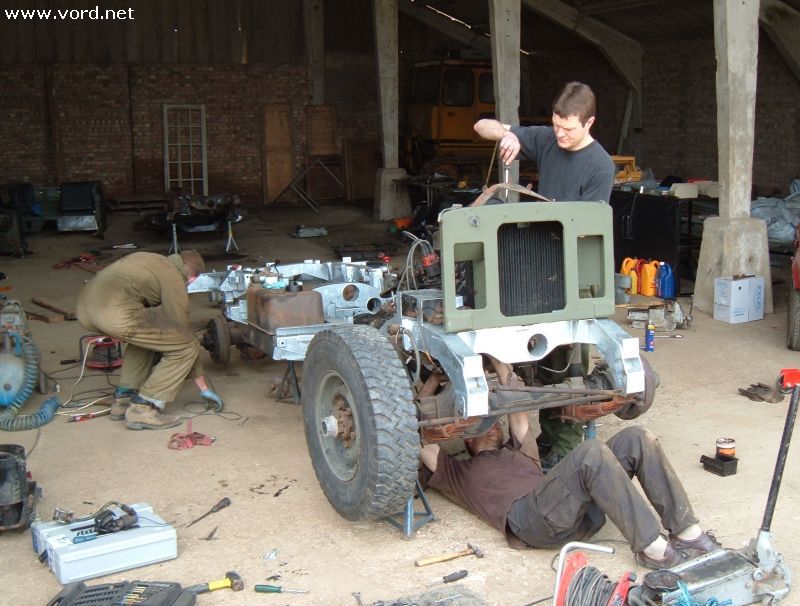 |
There wasn't much else left to pull off the old chassis so everyone moved over to the new chassis on Sunday. It turns out that the Land Rover is big enough for 4 people to work quite comfortably without getting too much in each other's way. The fifth person could take a break and surf the net. |
 |
The bulkhead is quite heavy. Four people could lift it on with some difficulty. We had to improvise the big bolts that fasten the bulkhead to the chassis as the originals had been ground off. We found some threaded bar and some rusty old farm sized nuts that seemed to fit. |
 |
The rear body also took four people to lift on, but it seemed more manageable than the bulkhead. Woodworking clamps were needed to pull the body towards the chassis to make the bolt holes line up. |
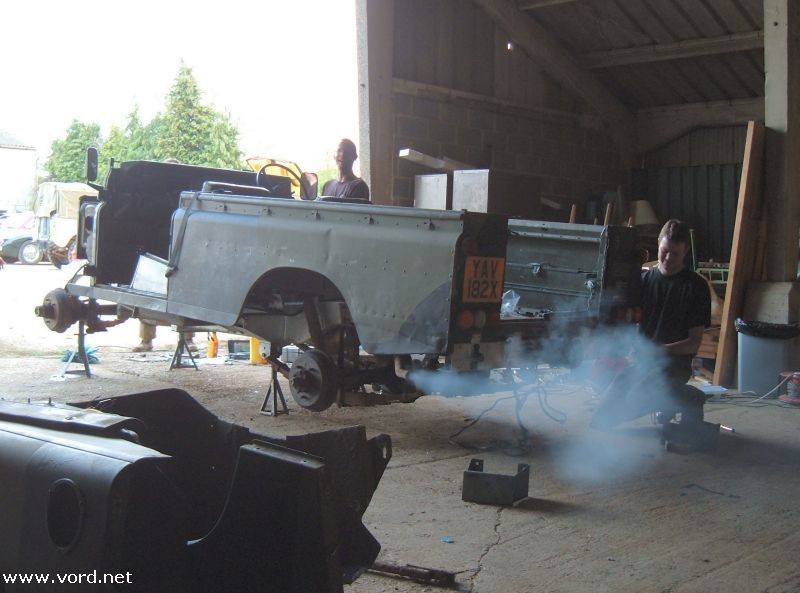 |
There is a trick to swapping a Land Rover chassis in a weekend. It's important not to recondition any of the components. Fortunately none of our team had included paint brushes along with the big hammers in their toolboxes. Top on the list of un-reconditioned components in this Land Rover was the engine which made a lot of smoke for the camera. |
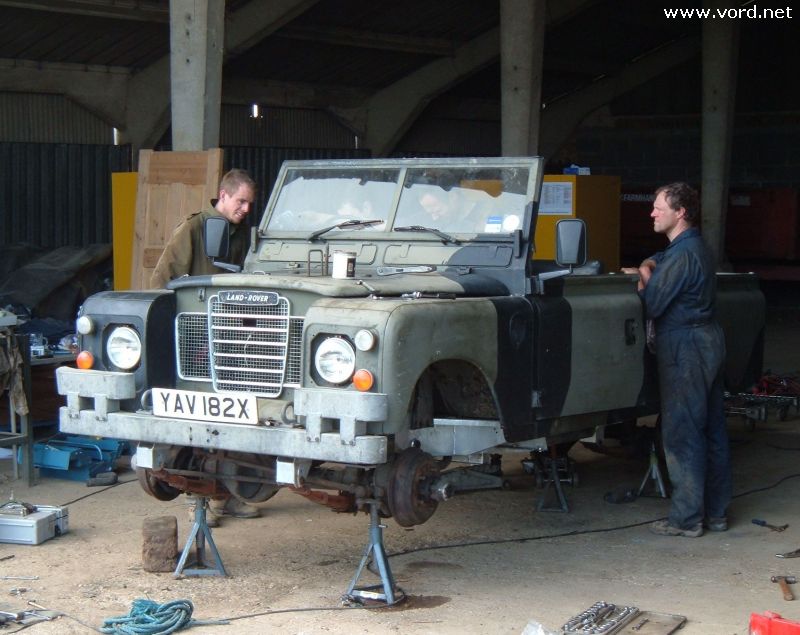 |
On Monday Morning the finishing touches such as connecting up the wiring and bolting on the doors were all that remained. See A handy reference to Lucas wiring colours. It could be considered cheating to claim a successful chassis swap in a weekend that continues into Monday. I should explain this was a bank holiday weekend. |
 |
Before lunch on Monday the Land Rover was driven triumphantly out of the garage. It seemed to work quite well apart from the brakes pulling to one side. Maybe we connected the pipes the wrong way round. |
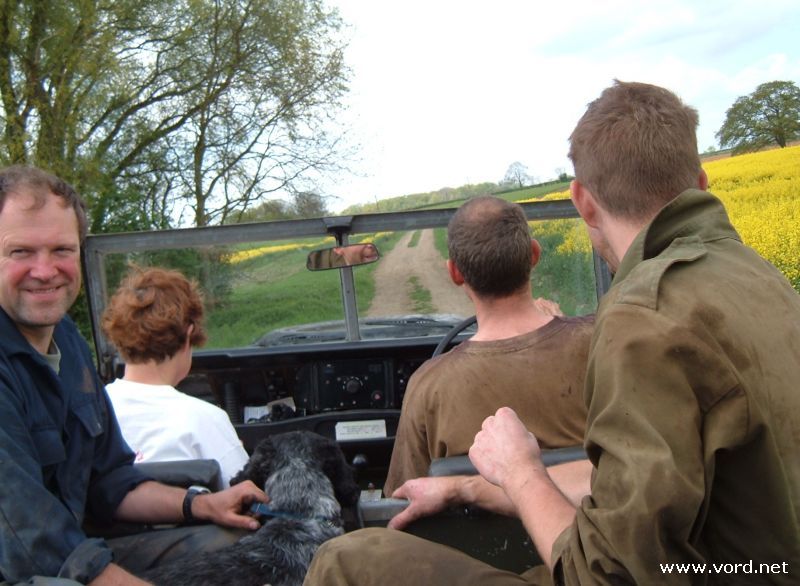 |
The Land Rover was immediately put through a series of demanding tests on the VORD proving ground. It seemed to jiggle along very nicely and nothing of any real importance fell off. |
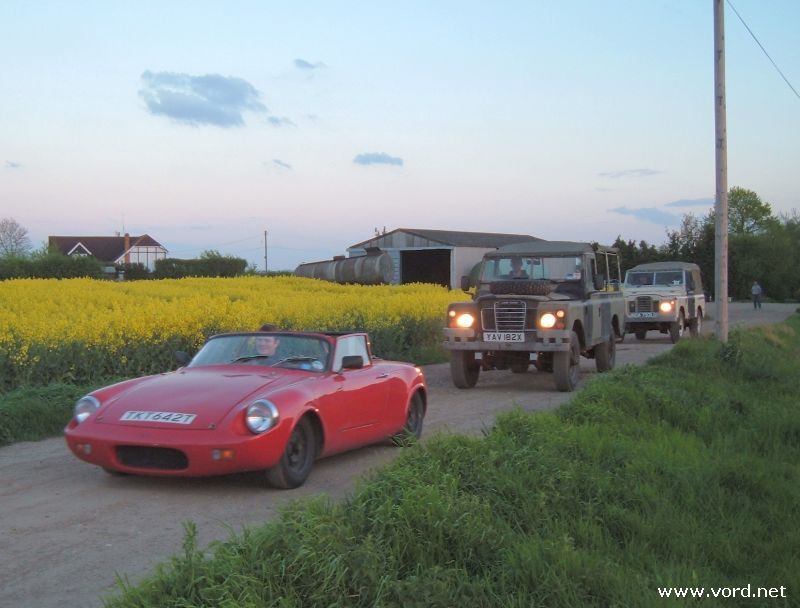 |
You can get an idea of the kind of nutters that helped in the chassis swap. Robert's Davrian is leading Chris's rejuvenated Land Rover. Bart's SWB Land Rover acts as a support vehicle. We sheltered under Bart's Land Rover during a rain storm and found a lot of rust in the chassis..... That's not a bad thing as we reckon we have the technology to do time lapse photography, and another chassis swap would be a great opportunity. |
We had 5 people working on the chassis swap over 2.5 days which works out at approximately 100 man hours. Chris paid about £1500 for the chassis and probably another £300 in keeping us fed and in beer.
Chris's photos will surely appear soon on http://www.stumpie.com/tech/
Back to: Home > Other Cars